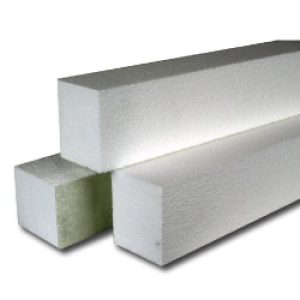
Our EPS Foam Forming Rails system is elegantly simple: eliminating ripping material, screwing, nailing, and in most cases, caulking to create the side rails in forming precast projects. It consists of 4 elements:
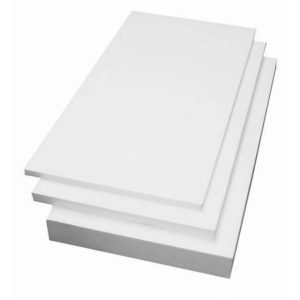
- Polystyrene foam rails
- Clear facing tape
- PSA tape
- Reusable urethane flexible edge profiles (optional)
Whether forming from 1/2-inch (1.27cm) up to 3-inch (7.62cm) thick, form edges are true with no bleeding between casting surface and foam forming rails. Installation tools required are just a tape measure, pencil, and knife.
How To Create A Common Square Edge W/ Foam Forming Rails
- Thoroughly clean the casting surface with denatured alcohol or acetone.
- Select foam forming rail for appropriate thickness.
- Remove 1st protective film layer of PSA tape and apply tape to the bottom of the foam rail, keep the edge of tape even with the inside edge of the foam rail.
- Cut to desired dimensions
- Remove 2nd protective film layer and begin applying foam rails to the casting surface as required.
- Foam rails may be bent into desired shapes or radii. Clear-facing tape must be applied to outside of bend. Multiple bends require taping both sides of foam rail. Tape that wrinkles in process must be replaced if on the inside of form against pour. Apply PSA tape after bending is complete. Depending on radius PSA tape may have to be applied in short lengths to achieve bend.
- Apply the corresponding thickness of clear-facing tape to span across the inside of all foam rails spanning across joints.
- Remove the protective film layer from clear facing tape.
- Thoroughly clean the casting surface again with denatured alcohol or acetone.
How To Create Flexible Edge Profiles W/ Foam Forming Rails
- Thoroughly clean the casting surface with denatured alcohol or acetone.
- Install your desired foam forming rail and adhere with PSA (Pressure Sensitive Adhesive) Tape to casting surface to serve as “backup” to edge profile. Allow for the width of the edge profile selected.
- Cut to desired length; corners may be mitered and / or coped. (Note: Longer pieces may go thru foam rails so as not to cut profile edges.)
- Remove 1st protective film layer and apply PSA tape to back side of edge profile.
- Remove 2nd protective film layer and begin applying edge profile to 1 ½” (3.8cm) foam rail serving as “backup”.
- Place edge profile firmly against foam rail and hold square and flat to casting surface.
- Caulk all edge profile seams, including junction with casting surface.
- Thoroughly clean the casting surface again with denatured alcohol or acetone.